Google Tag Manager (GTM) allows you to organise your own snippets of custom code (HTML, CSS, or JavaScript), and to specify when and where they should be triggered. It can do a lot more than this, but for the sake of this example lets keep it simple!
In this example we are going to have some custom code, which we would like to be applied to our GlobalPatron form.
Please Note: This feature is not available for "free trial" users, or for "login-protected" forms.
Step 1
Firstly, go to https://tagmanager.google.com/ and login with a Google account (it's free to sign up)
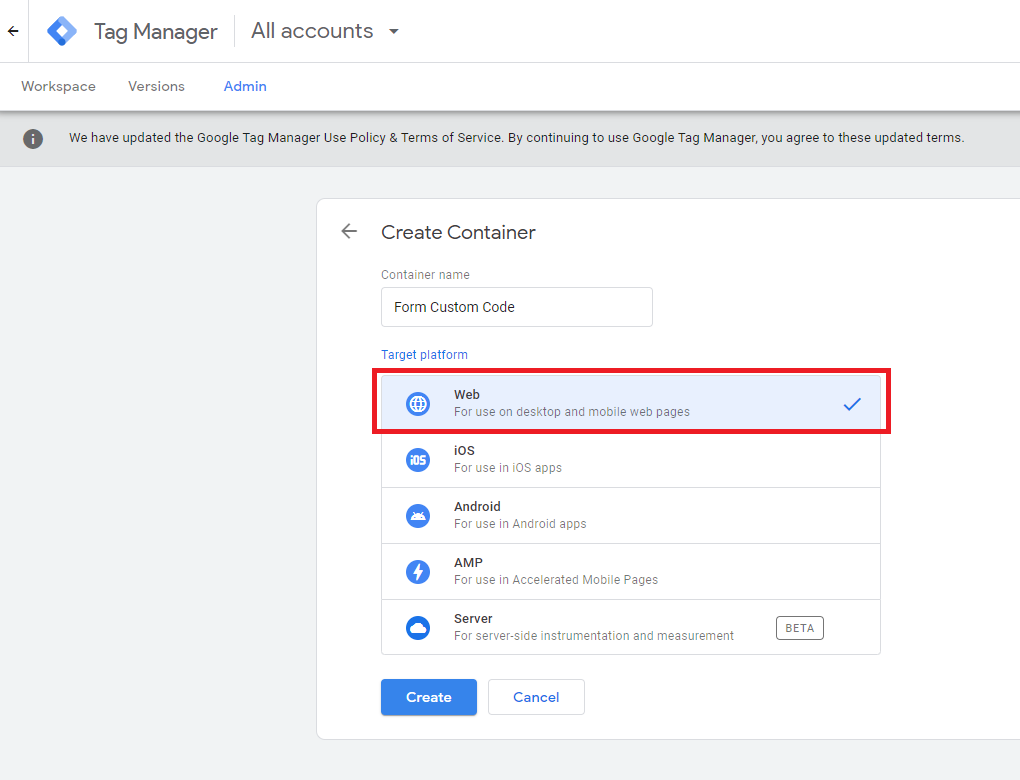
Step 2
After you have logged into GTM, create a new "Container" to store your custom code, and make sure to specify that this is intended for "Web" like in the screenshot below:
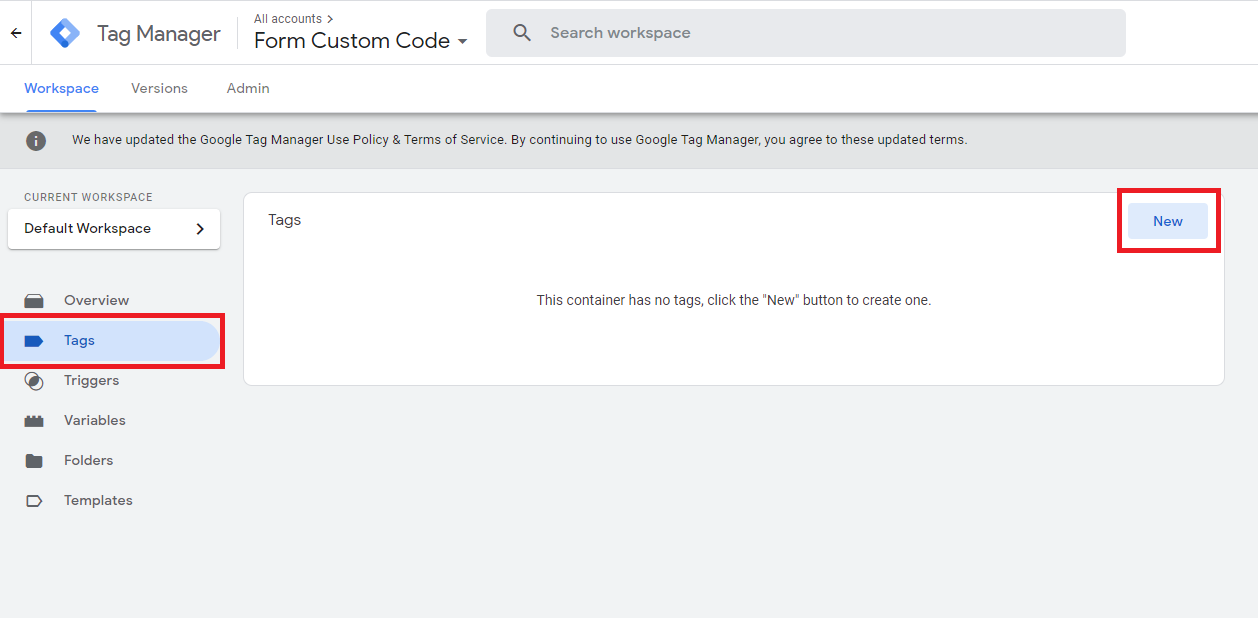
Step 3
Then we create a "Tag" under this container. "Tags" are a way for you to group different snippets of code in a logical manner. (e.g. you might have for example one tag for CSS, and another for JavaScript, rather than bunching them all together). In our example though we only need one Tag, so lets create it:
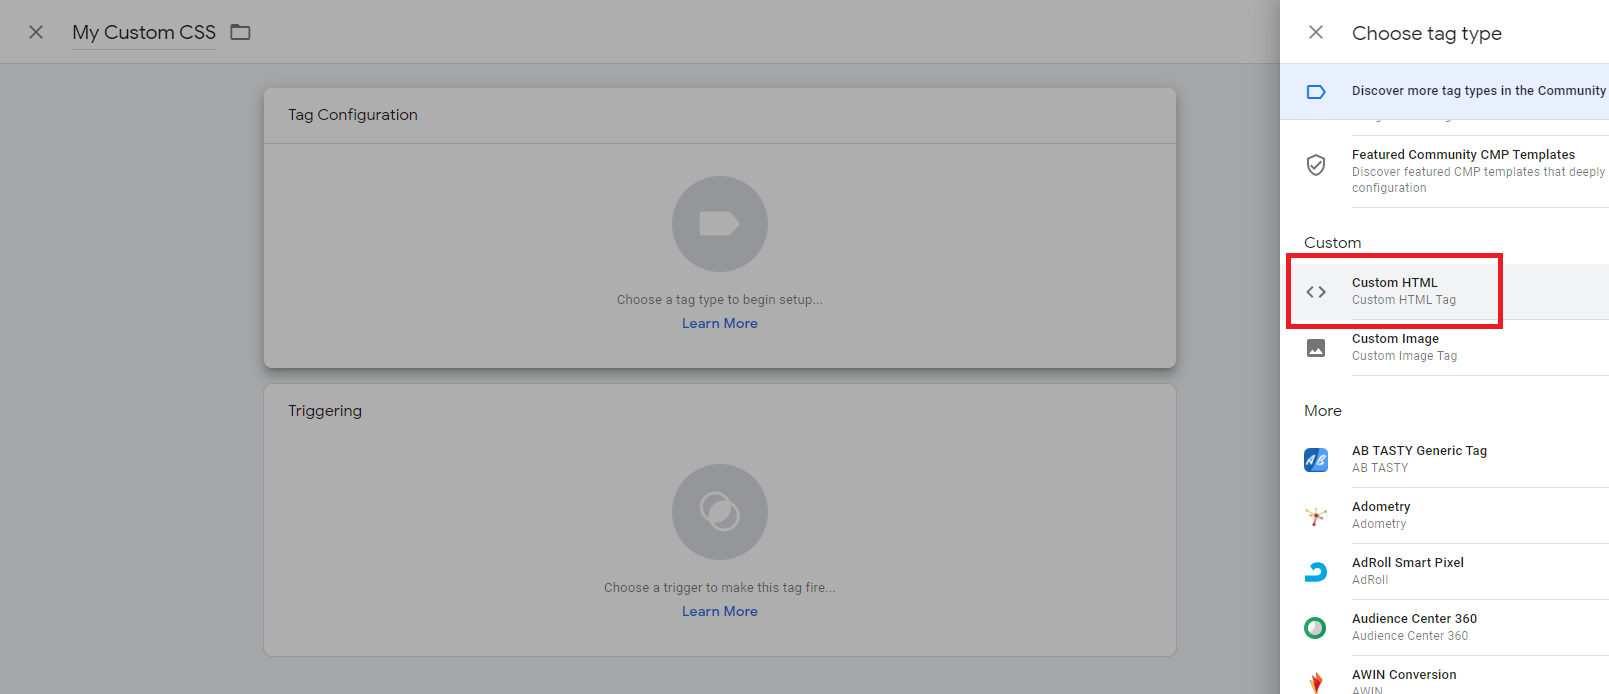
Step 4
When creating the tag, choose "Custom HTML" as the tag type, as this allows us to paste in any CSS, HTML, or JavaScript code we want:
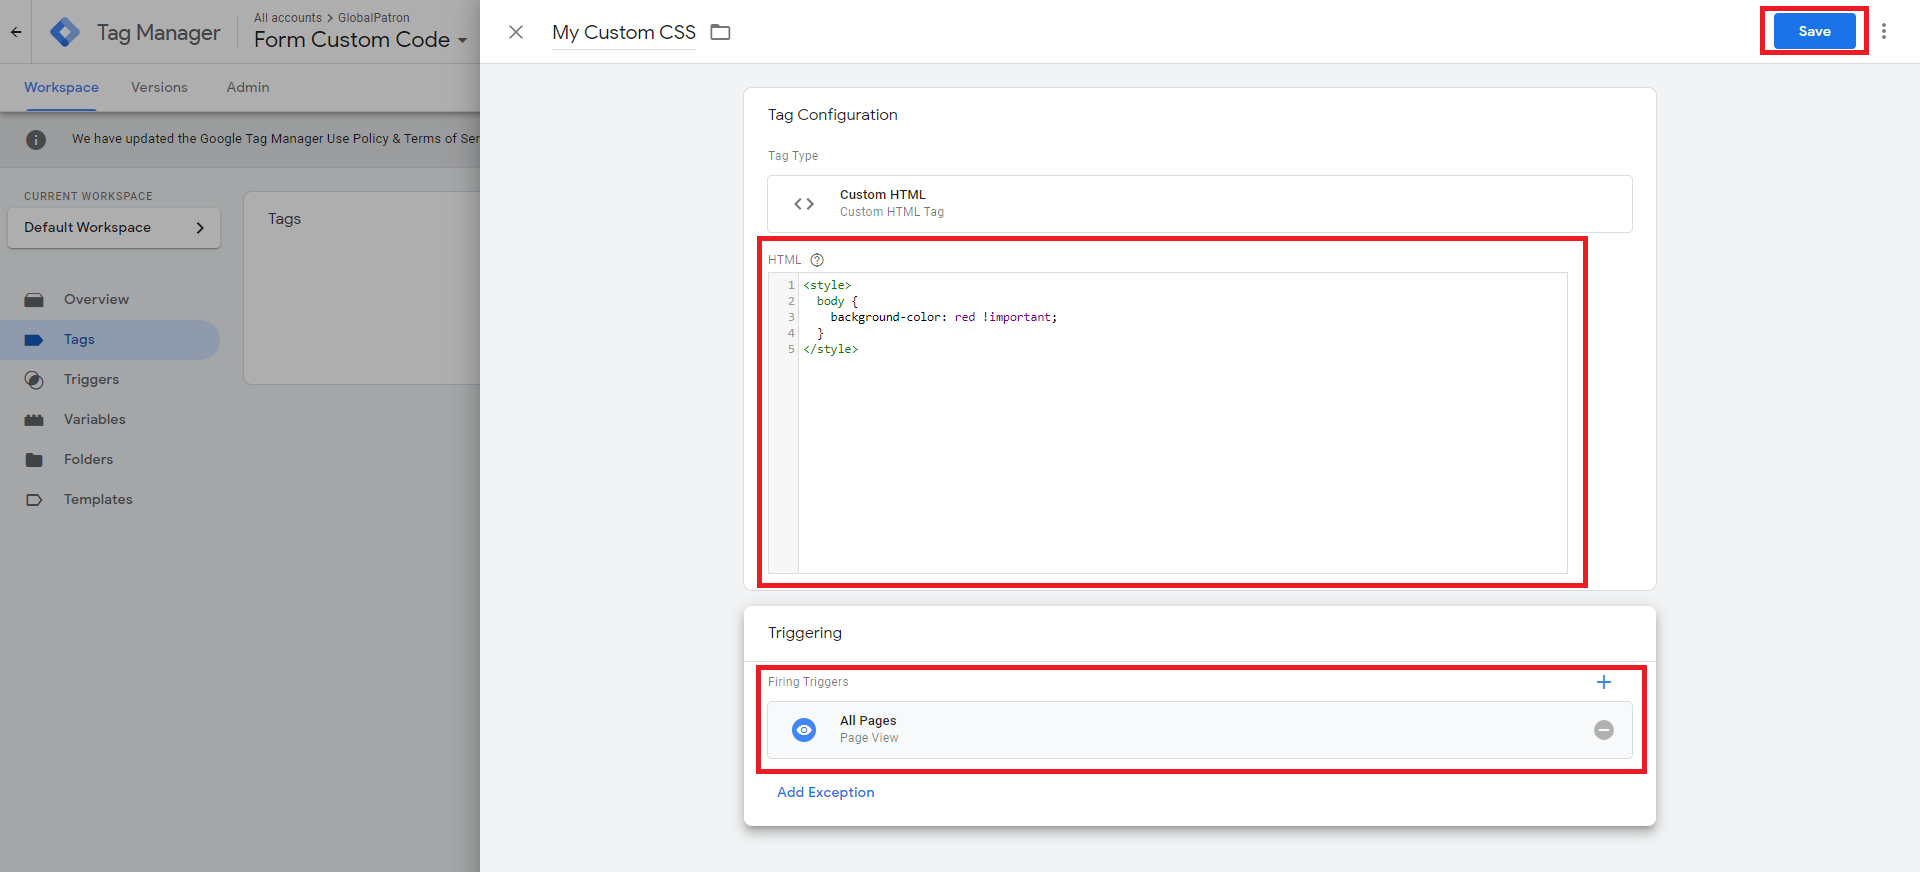
Step 5
Now we can paste in our custom code. If it's CSS code, don't forget to include the wrapping <style></style> tags! (or if its JavaScript don't forget to include the wrapping <script></script> tags)
We now also can specify the trigger for this code to be loaded. In our case we want to use the trigger called "All Pages - Page View" like in the screenshot below:
Step 6
We can now "Submit" and then "Publish" our snippet of code. (After you click "Submit" this will make the "Publish" button appear). At this stage you also have your unique GTM code (example highlighted in yellow below). This GTM code is needed for the final step which is when you are associating GTM with your form.
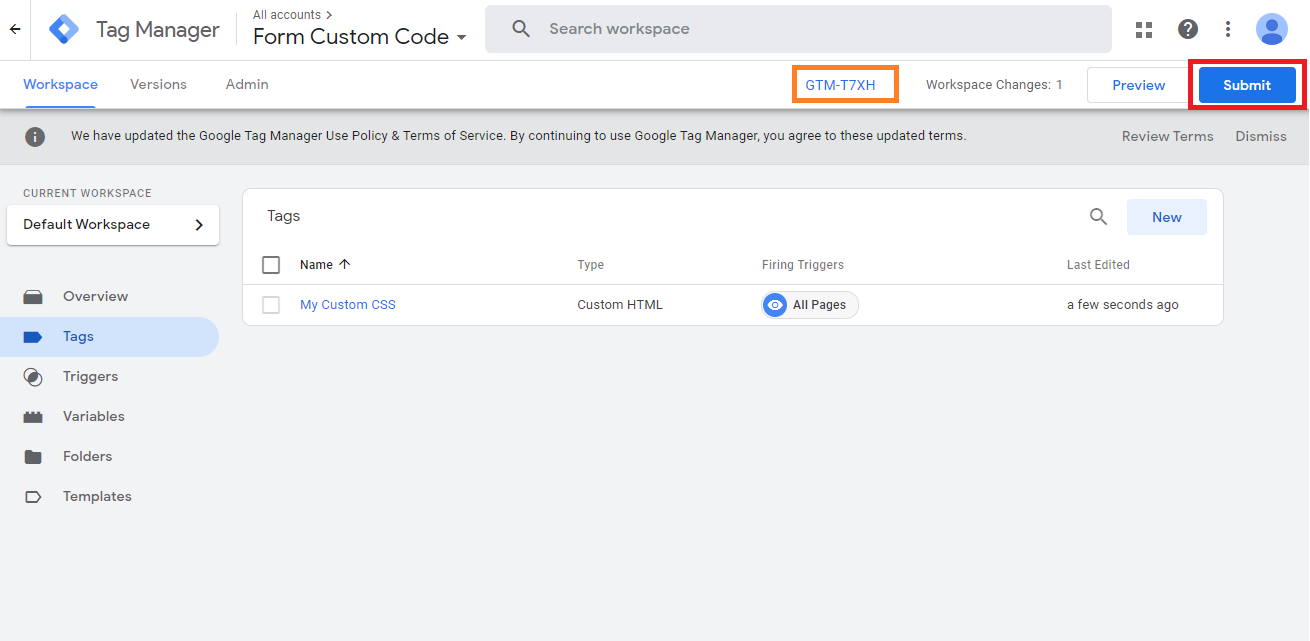
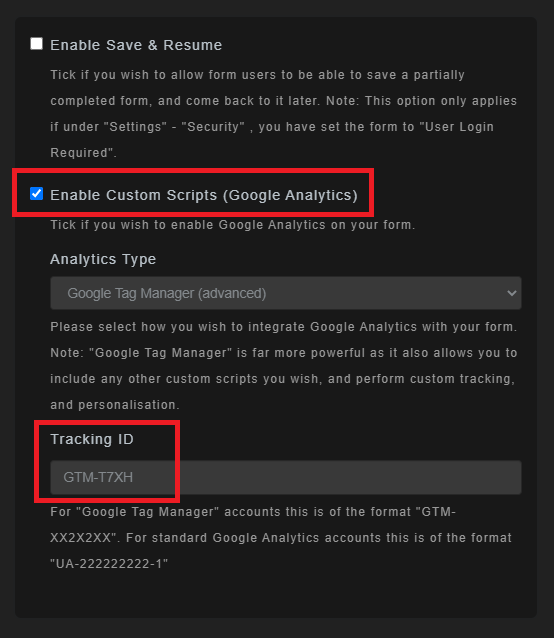
Step 7
In the GlobalPatron platform, when editing a form, on the right menu click on the "General Settings" menu option near the bottom of the page to open a popup with these settings below, and enter your GTM code:
Step 8
Your form now has your custom code from GTM running within it.
Note: to see your custom code in action you need to be viewing a published version of the form as the code will intentionally not render within the editor view of the form for security reasons.