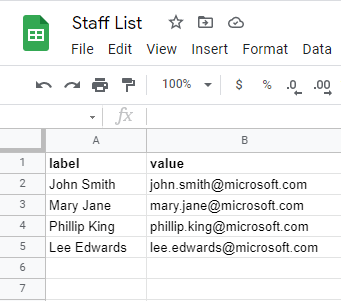
The first step is to create a Google sheet like in the example below. Notice that it has a column with the heading "label". This is the only column that is mandatory, and it's the entries in this column that get displayed to the user.
Our example below also has another column called "value" which is an optional column that you can use for scenarios where the displayed text needs to be different from what ends up getting submitted on your form. For example you might have a drop-list of staff names shown to the user, but behind the scenes you're only interested in that staff members email address, in those kinds of scenarios you would use this optional "value" column.
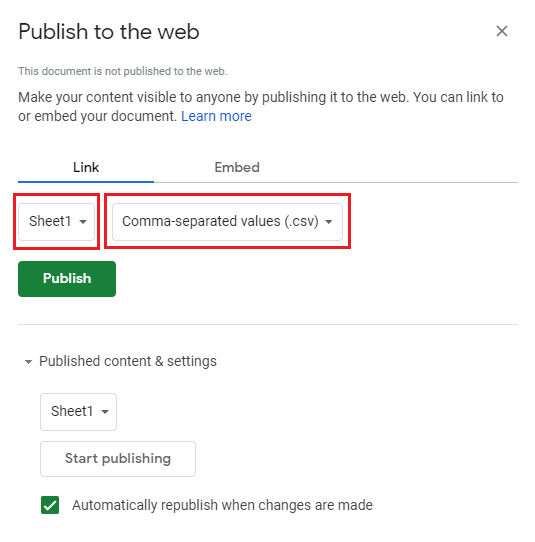
Now that you have created the Google Sheet and populated its values, the next step is to publish the Google sheet as a CSV file, to do this, simply click on "File" -> "Publish to the Web". This will bring up this screen:
Make sure to:
- Publish the relevant Sheet only
- Publish as Comma-separated values (.csv)
- Click "Publish" when ready
After you click "Publish", a unique URL will be generated for your Google Sheet. Copy this unique URL to the clipboard because you will need it for the next step.
Configuration
- Go to your "My Forms" screen and click on the edit icon of the form you wish to edit. The icon looks like this:

- Add a select list to your form by clicking on the "Select List" icon in the list of available form fields on the left of the screen, (or drag it to a particular location on the form). The field icon for a select list looks like this:

The select list will have some example entries in it by default, you can delete these. - Now that you have added a select list, please click on the "Dynamic Data Fields" module on the right of the screen. It looks like this

- Clicking on this will open up a popup asking you to specify which fields on your form are "Dynamic Data Fields". Here you can specify what "Public Google Sheet" URL will be supplying the data for which select list.
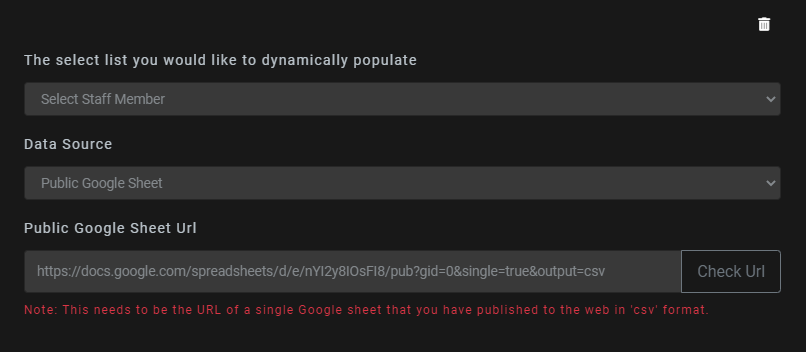
- After you have specified your source URL for each field, click "Save Changes"
- Your form should now have a field that is being populated with values that come from a Google Sheet.